Simple One-Hour Roast Chicken: Juicy & Crispy Every Time – A Weeknight Game-Changer
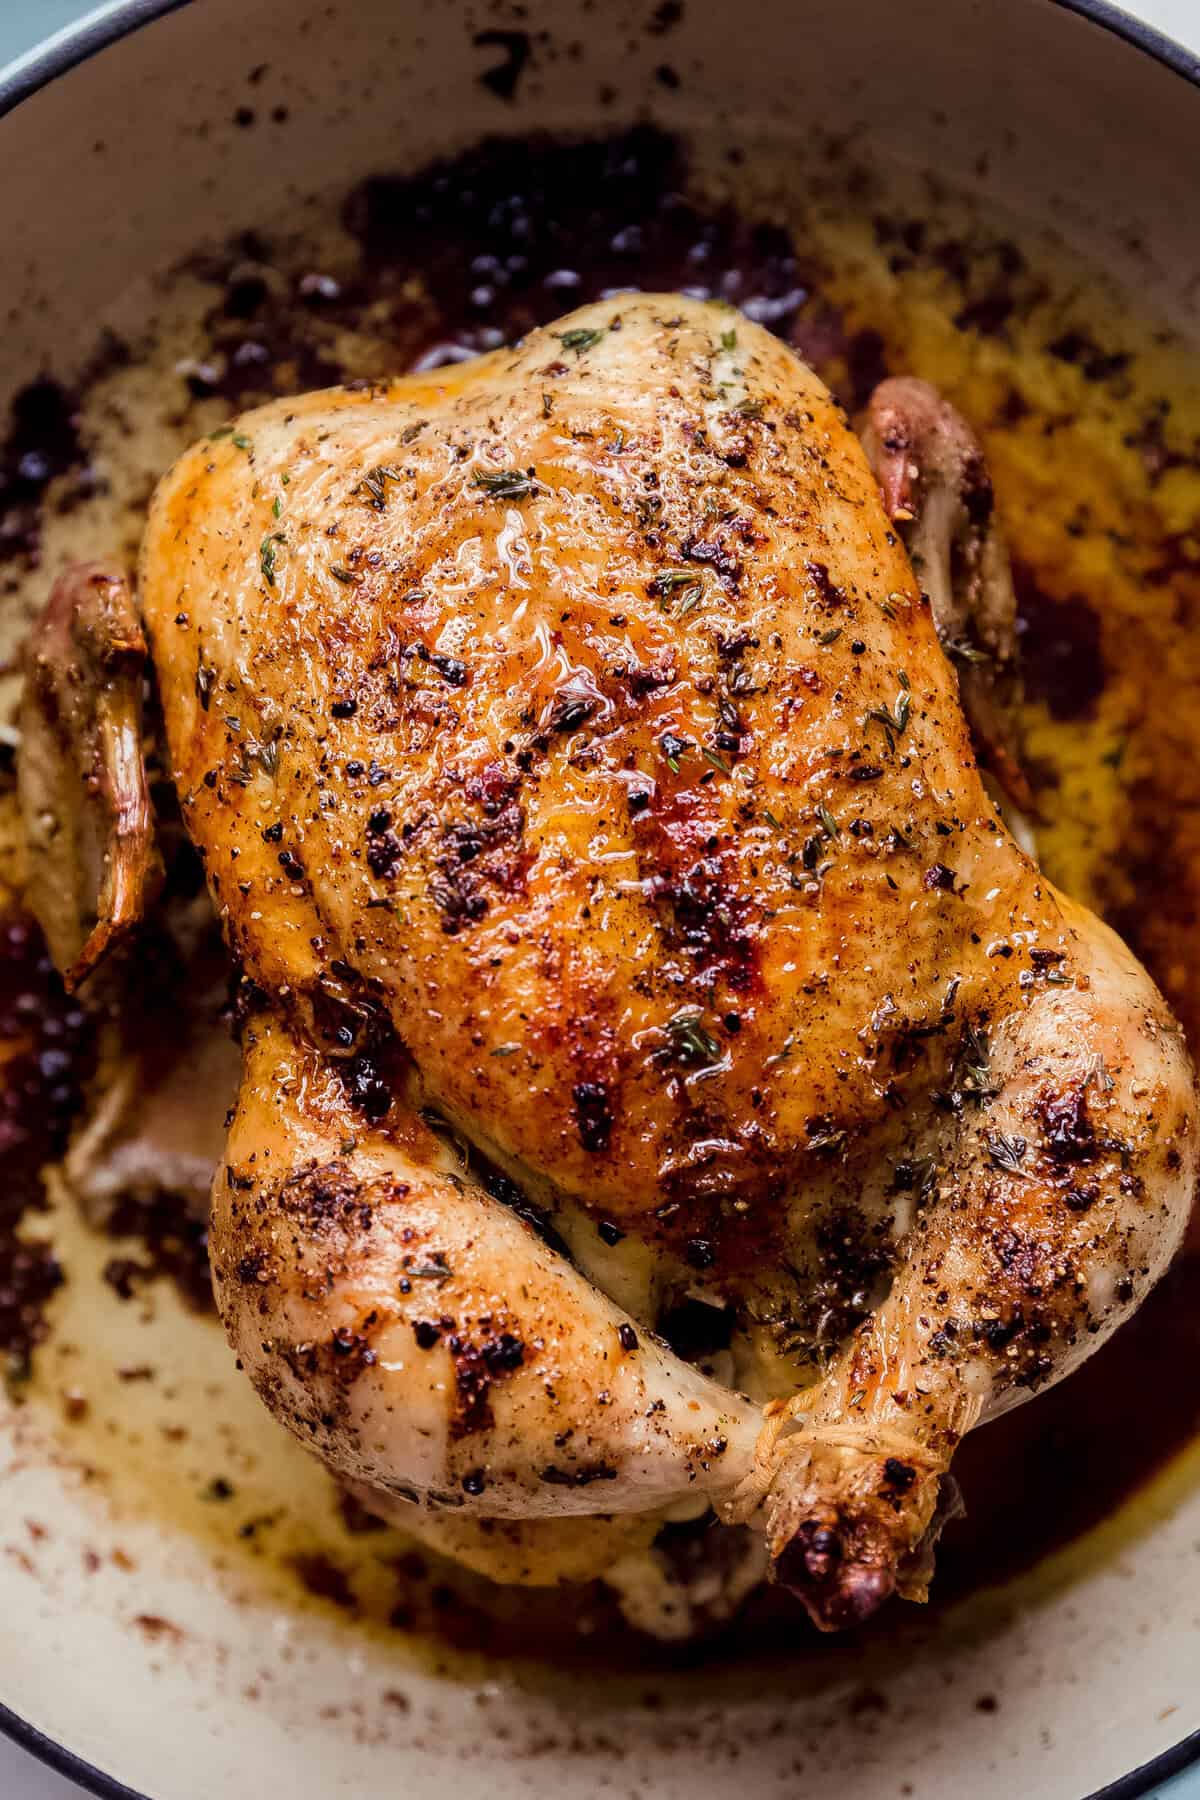
Imagine a perfectly golden, crispy-skinned whole roasted chicken, so tender and juicy that it practically falls off the bone. Now, imagine achieving this culinary masterpiece in just about an hour, with minimal fuss and maximum flavor. Sounds like a dream, right? Not anymore! Our simple whole roasted chicken recipe is designed to deliver restaurant-quality results in your home kitchen, transforming the humble chicken into an extraordinary meal that's both healthy comfort food and incredibly easy to make. Forget bland, dry chicken; this method ensures a consistently succulent bird with that irresistible crackling skin every single time.
For those who think roasting a whole chicken is a daunting task reserved for special occasions or seasoned chefs, prepare to have your mind changed. This isn't about complicated trussing or endless basting. It's about a clever technique, inspired by America's Test Kitchen, that simplifies the process while maximizing flavor and texture. In fact, many find this homemade version superior to anything you can pick up from the store. If you're tired of store-bought options and ready to elevate your dinner game, get ready to discover the magic of a One-Hour Whole Roasted Chicken: Better Than Store-Bought Rotisserie.
The Secret to a Perfectly Roasted Bird: Beyond Basic Roasting
Achieving that coveted combination of crispy skin and juicy meat requires more than just throwing a chicken into the oven. The genius behind this simple whole roasted chicken lies in a two-stage cooking method that optimizes heat distribution and moisture retention. It's a technique that's surprisingly hands-off but yields consistently spectacular results, almost like magic.
Why Temperature, Not Time, Reigns Supreme
One of the biggest mistakes home cooks make is relying solely on time for doneness. While a general cooking time (like "one hour") serves as a helpful guide, the ultimate indicator of a safe and perfectly cooked chicken is its internal temperature. According to the USDA, chicken must reach 165°F (74°C) to be safe to eat. However, for optimal texture, especially for dark meat, aiming for 180°-185°F (82°-85°C) can enhance its tenderness and flavor. Breast meat, on the other hand, is ideal at 165°F (74°C). The key takeaway? Always use an instant-read thermometer. This crucial tool removes guesswork and ensures your chicken is never undercooked or, just as importantly, overcooked and dry.
The Magic of the "Oven Off" Technique
This recipe's brilliance stems from an innovative approach to roasting that leverages residual heat for even cooking. Here’s how it works:
- Initial High Heat Blast: The chicken starts in a hot oven, which quickly begins to crisp the skin and kick-starts the cooking process. For a typical 4-pound chicken, this phase might take about 25 minutes, aiming to get the internal temperature around 120°F (49°C).
- Passive Finishing: Crucially, after this initial blast, the oven is turned OFF. Yes, you read that right! The chicken then continues to cook in the retained heat of the oven for another 30 minutes or so. This gentle, passive cooking allows the internal temperature to rise slowly and evenly, preventing the breast meat from drying out while ensuring the darker meat cooks through perfectly. This method helps the chicken finish cooking to its target 165°F (74°C) (or higher for dark meat) without direct, scorching heat.
This "oven off" technique is a game-changer for moisture, giving you a significantly juicier bird compared to conventional roasting methods. It truly embodies the "simple" in simple whole roasted chicken by minimizing monitoring.
Crafting Your Simple Whole Roasted Chicken: Ingredients & Prep
The beauty of this recipe lies in its simplicity. You don't need a pantry full of exotic spices or hours of intricate prep work. Quality ingredients and a few mindful steps are all it takes to create a show-stopping meal.
Essential Ingredients for Flavor & Texture
- Whole Chicken: Opt for a 3 to 4.5-pound chicken. A 4-pound bird is ideal for the approximate one-hour cooking time. Remember to remove any giblets or neck from the cavity. A 3-pound chicken typically serves 3-4 people, while a 4-pound chicken will comfortably feed 4-6, accounting for about ½ to 1 pound of cooked chicken per serving.
- Melted Butter: This is your secret weapon for incredible crispy skin and rich flavor. Brushing the bird with butter before and during roasting creates that beautiful golden-brown exterior.
- Lemons: A lemon cut in half and stuffed into the chicken's cavity adds a bright, aromatic scent and subtle citrus notes to the meat.
- Garlic: A whole head of garlic, cloves separated but not necessarily peeled, stuffed into the cavity, infuses the chicken with a delicious, savory aroma that will make your entire house smell amazing.
- Fresh Herbs: Thyme, rosemary, and parsley are classic choices. Stuff a few sprigs inside the chicken and sprinkle some chopped herbs over the skin for an extra layer of flavor and visual appeal. Lemon pepper seasoning is also a fantastic addition for the skin.
- Salt and Pepper: Don't underestimate the power of basic seasoning. Liberally season the entire chicken, inside and out.
Minimal Prep, Maximum Impact
Even though this recipe is incredibly easy, a few simple prep steps make all the difference:
- Pat Dry: This is crucial for crispy skin! Use paper towels to thoroughly pat the chicken dry, both inside and out. Excess moisture prevents the skin from crisping up.
- Season Generously: Don't be shy with the salt, pepper, and any other dry seasonings you choose. Season the cavity and the entire exterior of the chicken.
- Aromatics In: Stuff the lemon halves, garlic cloves, and fresh herb sprigs into the chicken's cavity. This infuses the meat with incredible flavor as it roasts.
- Butter Up: Brush the entire exterior of the chicken with melted butter. This helps with browning and crisping.
- To Truss or Not to Truss: While trussing (tying the legs together) can make the chicken look neater and sometimes cook slightly more evenly, it's absolutely not necessary for this recipe. If you're short on time or new to roasting, skip it! It won't significantly impact the deliciousness of your bird.
Step-by-Step: Your One-Hour Roasting Journey
With your chicken prepped, it's time to get it into the oven. This timeline is based on a 4-pound chicken; adjust slightly for smaller or larger birds, always relying on your thermometer for final doneness.
Roasting for Crispy Skin and Juicy Meat
- Preheat Oven: Preheat your oven to a high temperature, around 450°F (232°C). This initial high heat is key to achieving that desirable crispy skin.
- Initial Roast: Place the prepped chicken in a roasting pan or on a wire rack set over a baking sheet. Roast for approximately 25 minutes. During this time, the skin will begin to brown and crisp beautifully, and the internal temperature should reach roughly 120°F (49°C).
- Oven Off & Rest: After 25 minutes, turn the oven completely OFF. Leave the chicken inside the closed oven for another 30-35 minutes. Do not open the oven door during this time; let the residual heat work its magic. This is where the internal temperature rises gently to the target 165°F (74°C) for the breast and higher for the dark meat.
- Check Temperature: After the passive cooking period, use your instant-read thermometer to check the internal temperature. Insert it into the thickest part of the thigh, avoiding the bone. If it hasn't reached 165°F (74°C), you can turn the oven back on to a lower temperature (e.g., 350°F / 175°C) and cook for a few more minutes until it's done.
The Crucial Resting Period & Easy Gravy
Once your chicken has reached the correct internal temperature, remove it from the oven. Tent it loosely with foil and let it rest for 10-15 minutes before carving. This resting period allows the juices to redistribute throughout the meat, ensuring every bite is incredibly tender and moist. Skipping this step is a common mistake that leads to dry chicken.
While the chicken rests, you can quickly whip up a simple gravy using the pan drippings. Skim off any excess fat from the drippings in the roasting pan. Place the pan over medium heat on the stovetop. Deglaze the pan with a splash of white wine or chicken broth, scraping up any browned bits from the bottom. Whisk in a cornstarch slurry (cornstarch mixed with a little cold water) or a roux (butter and flour) until thickened to your desired consistency. Season with salt and pepper to taste. This easy gravy is the perfect accompaniment to your homemade feast, bringing all the flavors together.
For more detailed insights on achieving culinary perfection with your poultry, including comprehensive guidance on temperature control and gravy preparation, be sure to read our article Master Moist Roasted Chicken: Crispy Skin, Gravy & Temp Tips.
Troubleshooting & Expert Tips for Your Simple Whole Roasted Chicken
Even with a foolproof recipe, a few extra tips can ensure success every time.
Common Pitfalls and How to Avoid Them
- Dry Breast Meat: This is often due to overcooking or not allowing the chicken to rest. Our "oven off" technique specifically addresses this by preventing the breast from cooking too quickly. Always use a thermometer and rest the chicken!
- Soggy Skin: Ensure you pat the chicken very dry before roasting. Don't crowd the pan, allowing air to circulate. The initial high heat is also critical for crisping.
- Uneven Cooking: If one side seems to cook faster, consider rotating the pan halfway through the initial roasting phase. However, with the "oven off" method, this is less common as the heat evens out.
- Chicken Too Cold Before Roasting: While not strictly necessary to bring a whole chicken to room temperature (it's often safer not to for food safety reasons, especially for larger birds), ensure it's not straight from the fridge and deeply chilled, as this can extend cooking time.
Elevate Your Roast: Serving Suggestions & Beyond
Your simple whole roasted chicken is incredibly versatile. Serve it with classic sides like roasted potatoes (you can even roast them in the same pan if there's space!), steamed green beans, a fresh salad, or fluffy mashed potatoes. Leftovers are fantastic for sandwiches, salads, quesadillas, or quick weeknight stir-fries.
Once you've mastered this basic technique, you might consider experimenting with different aromatics – try orange slices, onions, or different combinations of fresh herbs. For an even quicker cook (though it requires a bit more prep), consider a spatchcocked chicken (butterflied chicken), which lays flat and cooks faster, often resulting in even crispier skin.
Conclusion
Roasting a whole chicken doesn't have to be an intimidating ordeal. With this simple, one-hour method, you can consistently achieve a perfectly juicy interior and irresistibly crispy skin, making it an ideal choice for a healthy weeknight dinner or an impressive meal for guests. By focusing on internal temperature and leveraging the ingenious "oven off" technique, you'll unlock a world of flavor and ease. So, grab your chicken, gather your aromatics, and prepare to delight your taste buds with the best homemade simple whole roasted chicken you've ever made. Happy roasting!
